

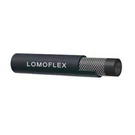
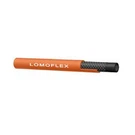


Replacing a damaged section of a rubber air hose is a practical skill that can save you time and money. As a trusted rubber air hose supplier, we understand the importance of maintaining the integrity of your hoses. In this blog, we'll guide you through the process step by step, ensuring that your rubber air hose is back in top - working condition in no time.
Understanding the Importance of Hose Maintenance
Rubber air hoses are widely used in various industries, from automotive repair shops to construction sites. They are essential for delivering compressed air to tools and equipment. A damaged hose can lead to air leaks, which not only waste energy but also reduce the efficiency of your tools. Moreover, in some cases, a severe leak can even pose safety risks.


As a rubber air hose supplier, we've seen firsthand the impact that proper hose maintenance can have. Regularly checking and replacing damaged sections can extend the lifespan of your hoses, saving you from the cost of frequent replacements.
Tools and Materials You'll Need
Before you start replacing the damaged section of the rubber air hose, gather the necessary tools and materials:
- Sharp utility knife or hose cutter: This is used to cut through the rubber hose cleanly.
- Hose clamps: Make sure you have the right size clamps for your hose.
- Replacement hose section: The new section should match the diameter and type of your existing hose. We offer a wide range of high - quality replacement hoses, including Oxygen Acetylene Hose, Rubber Water Hose, and Fuel Oil Hose to meet your specific needs.
- Lubricant: A small amount of lubricant can make it easier to insert the replacement section.
Step - by - Step Guide to Replacing the Damaged Section
Step 1: Identify and Locate the Damage
The first step is to carefully inspect the rubber air hose to find the damaged area. Look for visible signs such as cracks, cuts, holes, or abrasions. Pay special attention to areas near connectors, bends, or where the hose comes into contact with other objects. Once you've located the damage, mark it clearly with a piece of tape or a marker.
Step 2: Shut Off the Air Supply
Before you begin any cutting or replacement, it's crucial to shut off the air supply to the hose. This will prevent any sudden release of air, which could cause injury or damage. Locate the air compressor or the valve that controls the air flow and turn it off. If possible, release the remaining air pressure in the hose by pressing the trigger on your air tools.
Step 3: Cut Out the Damaged Section
Using a sharp utility knife or a hose cutter, carefully cut out the damaged section of the hose. Make sure your cuts are straight and clean. Measure the length of the removed section to ensure that your replacement hose is the correct size.
Step 4: Prepare the Replacement Hose
Take the replacement hose and cut it to the appropriate length. If necessary, use a deburring tool to smooth the cut ends of the hose. Apply a small amount of lubricant to the ends of the replacement hose. This will help it slide more easily into the existing hose sections.
Step 5: Join the Hoses
Insert one end of the replacement hose into one of the existing hose sections. Push it in firmly until it is fully seated. Repeat the process for the other end of the replacement hose and the remaining existing hose section.
Step 6: Secure the Connections with Hose Clamps
Place a hose clamp over each connection point. Tighten the clamps using a screwdriver or a clamp - tightening tool. Make sure the clamps are tight enough to prevent air leaks but not so tight that they damage the hose.
Step 7: Test the Hose
Once the replacement is complete, turn on the air supply and check for any air leaks. Listen for hissing sounds and visually inspect the connections. If you notice any leaks, tighten the clamps further or re - check the connections.
Tips for a Successful Replacement
- Choose the Right Hose: As a rubber air hose supplier, we recommend selecting a replacement hose that is compatible with your existing system. Consider factors such as pressure rating, temperature range, and chemical resistance.
- Inspect Regularly: Make it a habit to inspect your rubber air hoses regularly for signs of wear and tear. Early detection of damage can prevent more serious problems in the future.
- Proper Storage: When not in use, store your hoses in a cool, dry place away from direct sunlight and sharp objects. This can help extend their lifespan.
Conclusion
Replacing a damaged section of a rubber air hose is a relatively simple process that can be done with basic tools. By following the steps outlined in this blog, you can ensure that your hose is functioning properly and avoid costly downtime.
As a leading rubber air hose supplier, we are committed to providing high - quality hoses and excellent customer service. If you have any questions about hose replacement or need assistance in choosing the right hose for your application, don't hesitate to contact us for procurement and further discussions. We look forward to helping you keep your operations running smoothly.
References
- Industrial Hose Handbook, various editions
- Manufacturer's guidelines for rubber air hoses